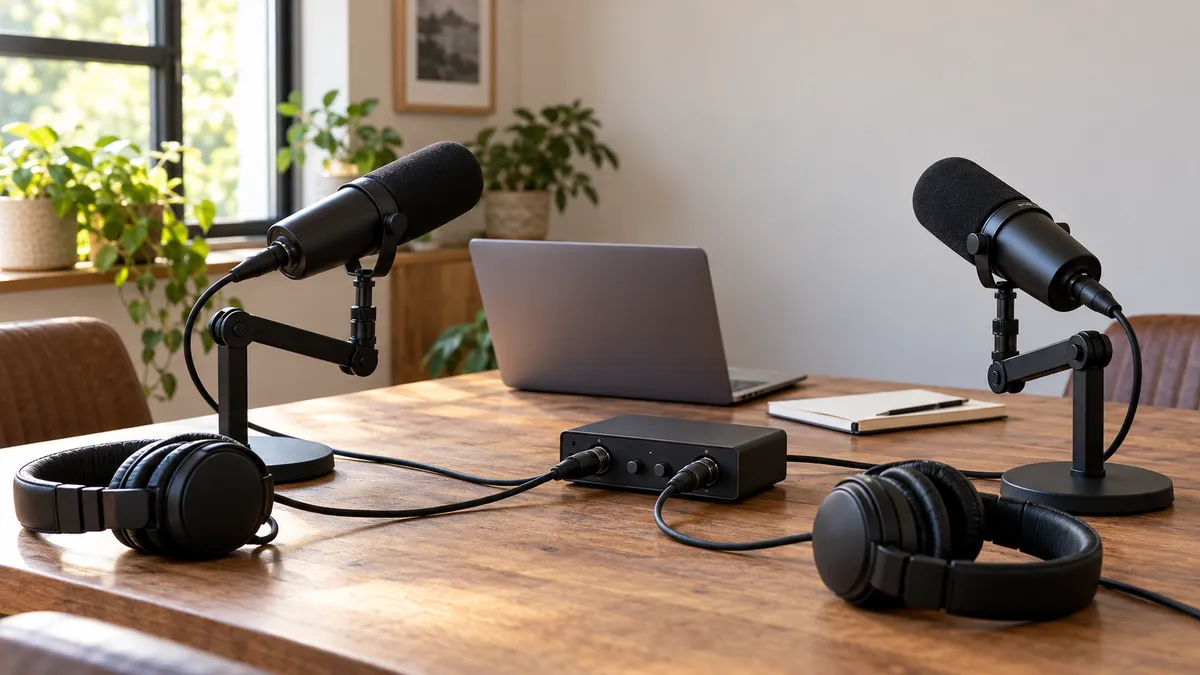
When two people are speaking into separate microphones, the useful starting point is simple: buy an interface with two microphone-capable inputs, then decide how each person will hear the conversation. A shared USB microphone records both voices as one source; two XLR microphones and two input paths keep the recording plan clear from the start.
For a two-person podcast, look for two mic preamps, separate gain control for each input, and a direct-monitor control you can understand at a glance. The Focusrite Scarlett 2i2 4th Gen, MOTU M2, and Arturia MiniFuse 2 all fit that basic two-microphone plan. Their differences matter most at setup time: the monitoring mode, headphone feed, and extra connections determine how smoothly the desk works.
Count microphones, not people or headphone sockets
Two people speaking at once need two microphone inputs if you want two separately recorded tracks. That count is independent of the number of headphone sockets, USB ports, or MIDI jacks on the front or rear panel. A two-input interface gives each microphone a channel; it does not automatically create a separate listening mix for a guest.
Make a small connection list before choosing:
- Microphone 1 to input 1 with XLR
- Microphone 2 to input 2 with XLR
- Interface to the recording computer by USB
- Headphones to the interface, or to a separate headphone splitter or amplifier when two people need to listen
That last line is where many compact setups get muddled. Two headphone pairs can share one feed through appropriate distribution hardware, but a shared feed means both listeners hear the same balance. A second independently controlled listener mix needs extra routing or equipment beyond a basic two-input interface.
Choose direct monitoring before you press Record
Direct monitoring sends the live microphone signal through the interface to the listening output, bypassing a return trip through recording software. It is useful when the hosts want to hear their own voices while recording. The decision to make is usually mono versus stereo: with two spoken microphones, mono monitoring puts both voices in the middle of the headphones, while stereo monitoring can place input 1 and input 2 left and right.
For a conversation, mono is often the less distracting starting point because both people hear both microphones centered. Stereo can help during setup when you want to tell the two inputs apart. Either way, choose one monitoring path for the live microphones. If software monitoring is also enabled for the same inputs, the two paths can make speech sound doubled.
Check what each front-panel input actually does
The connector shape is only the first part of the input decision. On these compact interfaces, a microphone can use XLR while a keyboard, recorder, or other line-level source may use a quarter-inch connection. If the podcast desk is dedicated to two microphones, that flexibility is a bonus rather than a reason to squeeze a third source into the session.
Focusrite’s 2i2 guide spells out a useful practical detail: inserting a quarter-inch plug into an input disables that input’s matching XLR connection. That is exactly what a combined jack should do, but it is worth noticing before a recording day. When another plug has taken over the channel, move the microphone to the open input before recording.
The M2 guide likewise identifies its combo jacks as preamped microphone, line, or instrument inputs. For two spoken microphones, leave the plan boring: one XLR cable to each input, then set each voice’s gain independently. If a guest’s microphone is much quieter or louder, correct that at the input; the headphone-level knob changes listening volume.
Phantom power belongs in the same preflight note. Some microphones need 48V power and others do not. The 2i2 applies its 48V switch to both XLR microphone inputs, so check both microphones and their instructions before enabling it. This is not a reason to avoid a two-input interface; it is simply one of the physical details to settle before the conversation begins.
Make a three-minute setup routine repeatable
The best time to learn a monitoring button is before a guest is waiting. A repeatable routine keeps the small desk from becoming a troubleshooting project:
- Connect each microphone to its own input and keep the input labels in the recording software aligned with the physical side of the table.
- Speak normally into each microphone one at a time while setting the two gain controls. Leave the headphone volume for listening level.
- Start with direct monitoring in mono so each person hears both voices in the center. Change to stereo only if separating input 1 and input 2 helps identify a problem.
- Make a short recording, play it back, and then decide whether the speakers need the same headphone feed or a separate distribution solution.
That routine also makes it easier to diagnose a missing voice. If only one track is silent, first check the cable and the corresponding input; if both tracks are present but the hosts cannot hear themselves, check the monitoring mode and headphone connection. Keeping recording and listening as separate checks prevents a harmless headphone-routing choice from being mistaken for an input failure.
Compare the controls that affect a two-person desk
Focusrite Scarlett 2i2 4th Gen: separate gain controls and visible monitor modes
Focusrite documents a gain control for input 1 and another for input 2; its input-selection button changes which preamp the other controls address. The same hardware guide lists a Direct Monitor button with off, mono, and stereo settings, plus a dedicated headphone level control and front-panel headphone socket. That makes the monitoring choice concrete rather than buried in software. Focusrite’s Scarlett 2i2 4th Gen hardware guide documents those controls.
One setup detail is worth checking before using condenser microphones: Focusrite says its 48V switch applies phantom power to both XLR mic inputs. That is normal for this interface, but it means the two microphones should be considered together before turning it on.
MOTU M2: hold the MON button when you need two inputs in stereo
The M Series guide describes the M2’s XLR/quarter-inch combo jacks as mic, line, and instrument inputs with preamps. Its MON button routes an input directly to the outputs; holding the button engages stereo monitoring across both inputs, with input 1 routed to output 1 and input 2 to output 2. That is a useful distinction for two voices: start with the centered mono path when conversation is the priority, then use the stereo mode when separating the inputs in the headphones helps troubleshoot a level or cable.
The same guide says the front headphone output mirrors the Monitor 1–2 signal and has its own volume knob. It can give a host a convenient level control, but it is still a shared program for anyone splitting that feed. MOTU’s M Series User Guide covers the inputs, MON control, and headphone behavior.
Arturia MiniFuse 2: keep the two microphone inputs separate from its extra ports
Arturia lists two front combo jacks that accept XLR or TRS connections, so they can take two XLR microphones in the basic plan. The MiniFuse 2 also has MIDI In and Out plus a USB hub. Those are helpful desk connections for a MIDI controller or another USB accessory, but they do not change the count of microphone inputs.
Its documentation says the front headphone output mirrors the monitor output while retaining its own volume control. Treat that as one shared headphone feed, then add a suitable splitter or headphone distribution device if both speakers need to listen. Arturia’s MiniFuse 2 connection guide identifies the combo inputs, headphone behavior, MIDI ports, and hub.
Make the second-listener decision separately
The interface decision answers how to get two microphones into the computer. The listening decision answers whether one person monitors, both people share one feed, or each person needs a different balance. Keep those decisions separate and the compact two-input category makes much more sense.
If both hosts are at the desk, begin with comfortable headphone levels, both microphones centered in a mono direct-monitor mode, and a short test recording. If the room needs a more involved setup later, a headphone amplifier, mixer, or interface with additional outputs is the part to compare—not another microphone input disguised as a USB or MIDI connection.
Bring the small pieces that make the interface usable
An interface is the center of the signal path, not the whole desk. Put the rest of the basic kit beside it before the recording session: two microphones, two XLR cables, two microphone stands or boom arms, a computer cable, and at least one pair of headphones. When both speakers need headphones, add the splitter or distribution device to the same list instead of treating it as an afterthought.
This list also helps when comparing a compact unit with a more elaborate interface. A two-input model earns its place when the recording goal is two spoken voices and the monitoring plan stays simple. More outputs become valuable when the listeners need different balances, when a producer needs a third headphone feed, or when the desk must route additional sources. Those are routing decisions, so write them down next to the microphone count.
Keep the first session modest. Record a few lines with each person at the table, listen back through the same headphones, and note anything that needs adjustment for the next session. The two separate input channels give you a clean place to start; the rest of the setup can grow only when the podcast’s actual routine calls for it.
Evidence boundary
This comparison uses manufacturer documentation for documented connections and monitoring behavior plus current listing availability for the named models. It does not compare price, sound quality, latency in a particular computer setup, or promise two independently controlled listener mixes from a two-input interface.
Sources
- Focusrite, Scarlett 2i2 4th Gen hardware features.
- MOTU, M Series User Guide.
- Arturia, MiniFuse 2 connections.
- Universal Audio, FAQ: Volt Desktop Interfaces.